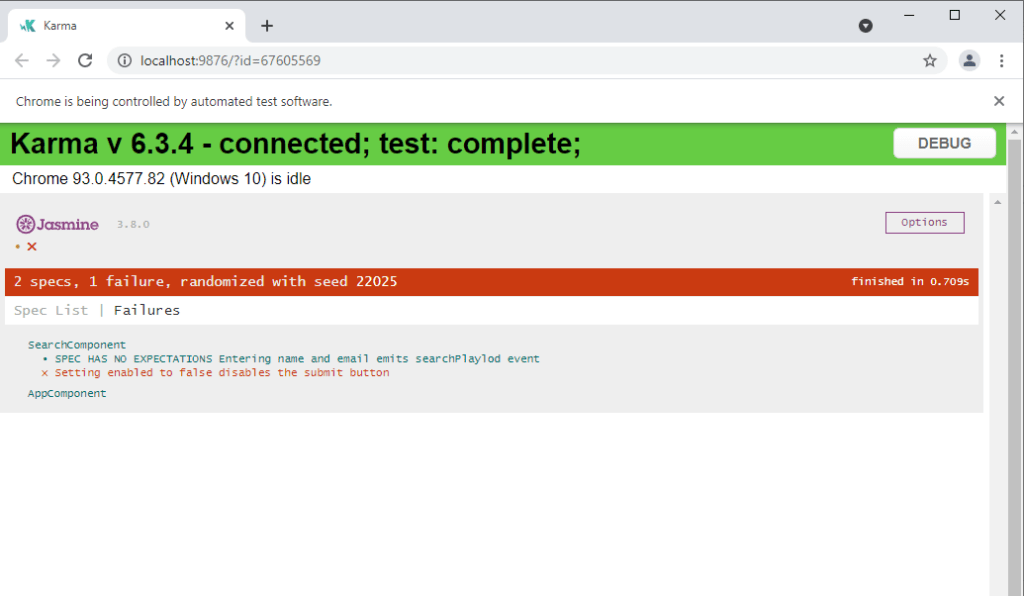
Angular comes built-in with Jasmine and karma so testing is really easy. Jasmine is a testing (Behavior Driven Development) framework and karma. in this article angular component testing, we’ll demonstrate how to build a simple Angular app and then walk through the unit testing process step by step with examples. By the end of this post, you should feel comfortable writing specs to test your Angular components, directives and input-output property.
Table of Contents
How do we start Angular component testing?
create a new Angular application by typing ng new angular-component-testing from your terminal. Use the Angular CLI to generate a new component named search. When you’re done, the SearchComponent template and class file should look like this(The source code is available on Stackblitz).
<form>
    <label>Name</label>
    <input type="text" #name id="name">
    <label>Email</label>
    <input type="text" #email id="email">
    <button type="button" id="searchbtn"  (click)="search(name.value, email.value)" [disabled]="!hasEnabled">Search
    </button>
</form>
import { Component, EventEmitter, Input, OnInit, Output } from '@angular/core';
import { SearchPayload } from '../model/Search';
@Component({
selector: 'app-search',
templateUrl: './search.component.html',
styleUrls: ['./search.component.scss']
})
export class SearchComponent implements OnInit {
@Output() searchPayload = new EventEmitter<SearchPayload>();
@Input() hasEnabled = true;
constructor() { }
ngOnInit(): void {
}
search(name: string, email: string) {
if (name && email) {
let searchFormValue: SearchPayload = { email: email, name: name }
this.searchPayload.emit(searchFormValue);
}
}
}
Basics of Angular component testing
Jasmine is a testing framework which provides a bunch of functions that we use to write tests the two functions that we used most of the time are describe and it. we use describe to define a suite which is a group of related tests and we use it to define a spec or a test.
- describe(): It’s a suite of tests
- it(): Declaration of a single test
- expect(): Expect something to be true.
Karma is a test runner. It will automatically create a browser instance, run our tests, then gives us the results. Results are displayed on both the command line and on the browser to check which tests have passed or failed. At the root of the Angular project, we have the file karma.conf that’s used to configure Karma.
To run this test, simply execute the following command: ng test

Creating our own unit tests
let’s see how we can use the describe, We are going to write a test around a search component. In the component below, we have a template with two text boxes, one button, and two properties on searchComponent class called “searchPayload“(output property) and “hasEnabled” (input property). We will use these textboxes and buttons to write tests around once we have our spec set up.i t’s time to write the tests. Here’s an example of angular component testing and how to write a spec for searchComponent:
import { DebugElement } from '@angular/core';
import { ComponentFixture, TestBed } from '@angular/core/testing';
import { By } from '@angular/platform-browser';

import { SearchComponent } from './search.component';

describe('SearchComponent', () => {
  let component: SearchComponent;
  let fixture: ComponentFixture<SearchComponent>;

  // UI element
  let searchBtn: DebugElement;
  let nameEle: DebugElement;
  let emailEle: DebugElement;

  beforeEach(async () => {
    await TestBed.configureTestingModule({
      declarations: [SearchComponent]
    })
      .compileComponents();
  });

  beforeEach(() => {
    fixture = TestBed.createComponent(SearchComponent);
    component = fixture.componentInstance;

    // UI Element
    searchBtn = fixture.debugElement.query(By.css('#name'));
    nameEle = fixture.debugElement.query(By.css('#email'));
    emailEle = fixture.debugElement.query(By.css('#searchbtn'));

    fixture.detectChanges();
  });

});
Testing the @Input of a component
We need to check that the search button is enabled or disabled depending on the value of the hasEnabled input property. Here’s an example of how to write a spec for the @input property.
it('Setting enabled to false disables the submit button', () => {
    component.hasEnabled = false;
    fixture.detectChanges();
    expect(searchBtn.nativeElement.disabled).toBeTruthy();
  });
The Spec in Detail
- We set the value of the component’s hasEnabled property to false.
- We also need to call fixture.detectChanges() so the template is updated with the new changes, otherwise property will not be bound to component.
- Check if the search button should be disabled.
Testing the @Output of a component
When the user enters name and email field value, track what gets emitted by the output event. let’s see how we can track what gets emitted by the output event and add some expectations for it
it('Entering name and email emits searchPlaylod event', () => {

    emailEle.nativeElement.value = "test@example.com";
    nameEle.nativeElement.value = "user1";

    component.searchPayload.subscribe((value: SearchPayload) => {
      expect(value.email).toBe("test@example.com");
      expect(value.name).toBe("user1");
    });
    searchBtn.triggerEventHandler('click', null);
  });
The Spec in Detail
- We set the value of the component’s name and email filed values “user1” and “test@example.com”
- Trigger a click on our search button, this synchronously emits the search payload object in the subscribe callback!
- Check if the callback values are equal to the form filed value of the component.
Related Post
Source code available for download
The source code is available on Stackblitz of theAngular component testing with @input, @output, and service.
Demo Application URL : URL or https://create-localized-datepipe-and-formatting.stackblitz.io
