Multiple times we have come across where we might have to add multiple fields in Angular Material dynamic form based on a different use case or role-based screen. for example, we might want to add dynamically field for different user role types or even add input dynamically. We can live it up to the developer to decide whether they want to add more form fields.
In this article, we will create a Angular Material dynamic form (login and dashboard page). It’s kind of a strange scenario, but it definitely helps to understand the underlying concept.
Table of Contents
How to create Angular Material dynamic form fields from JSON
In the app.component.ts, first, we have to import the FormGroup, FormBuilder, Validators from ‘@angular/forms’ to make it possible to add dynamic controls to the Angular Material dynamic form.
Next, we have to add a method in app.component.ts to fetch JSON from REST API, and after the success response from REST API, every time createControl method is called a form control is pushed into the form.
import { HttpClient } from '@angular/common/http';
import { Component } from '@angular/core';
import { FormGroup, FormBuilder, Validators } from '@angular/forms';
import { MatSnackBar } from '@angular/material/snack-bar';
import { Subscription } from 'rxjs';
import { LayoutModel } from './core/models/LayoutModel';

@Component({
  selector: 'app-root',
  templateUrl: './app.component.html',
  styleUrls: ['./app.component.scss']
})
export class AppComponent {

  formLayout: LayoutModel;
  subscriptions: Subscription;
  componentName: string | null;
  form: FormGroup;

  get isFieldLayout() {
    return this.formLayout.layoutType == "field" ? true : false;
  }

  constructor(
    private _snackBar: MatSnackBar,
    private _fb: FormBuilder,
    private _httpService: HttpClient) {

    this.subscriptions = new Subscription();
    this.formLayout = {
      layoutType: '',
      title: '',
      fields: [],
      cssClass: ''
    }
  }

  ngOnInit() {
    this.getLayout();
  }

  getLayout() {
    this.subscriptions.add(this._httpService.get<LayoutModel>("/assets/data/home-layout.json").subscribe(res => {
      this.formLayout = res;
      this.form = this.createControl()
    })
    )
  }

  ngOnDestroy() {
    this.subscriptions.unsubscribe();
  }
  }
Next, we will create a method that can be called to dynamically insert form controls into the form. lets called the method “createControl()” within this method we simply going to push a new form control in the form array and add validation dynamically.
createControl() {
    const group = this._fb.group({});
    this.formLayout.fields.forEach(field => {
      if (field.type === "button") return;
      const control = this._fb.control(
        field.value, this.bindValidations(field.validations || [])
      );
      if (field.name !== undefined) {
        group.addControl(field.name, control);
      }
    });
    return group;
  }
bindValidations method sets validation to the Angular Material dynamic form fields. right now we are using required and pattern validation. We can also apply custom validation inside this method.
bindValidations(validations: any) {
    if (validations.length > 0) {
      const validList: any[] = [];
      validations.forEach(valid => {
        if (valid.name == "required") {
          validList.push(Validators.required);
        }
        if (valid.name == "pattern") {
          validList.push(Validators.pattern(valid.validator));
        }
      });
      return Validators.compose(validList);
    }
    return null;
}
Finally we add click event listener onSubmit. on click event we are going to call submit method.
onSubmit(event: Event) {
    event.preventDefault();
    event.stopPropagation();
    if (this.form.valid) {

    } else {
      this.validateAllFormFields(this.form);
    }
  }
Next, we have to add a mat-toolbar for navigation. inside the toolbar, we have added links to two pages, which we will use to create page dynamically.
<mat-toolbar color="primary">
  <mat-toolbar-row>
    <span>Demo App</span>
    <span class="example-spacer"></span>
    <button mat-icon-button  >
      <mat-icon>dashboard</mat-icon>
    </button>
    <button mat-icon-button    >
      <mat-icon>verified_user</mat-icon>
    </button>
  </mat-toolbar-row>
</mat-toolbar>
Angular material add input dynamically, in the following code snippets, we have used two ng-templates to create a page layout based on layout type or input type. Here we are using basic logic. You can customize it as per your requirements.
<div class="container pt-3">
  <ng-container *ngIf="isFieldLayout; then fieldsTemplate; else formTemplate">
  </ng-container>
</div>

<ng-template #fieldsTemplate>
  <div class="row">
    <div [ngClass]="field.cssClass" *ngFor="let field of formLayout?.fields;">
      <div dynamicField [field]="field"> </div>
    </div>
  </div>
</ng-template>

<ng-template #formTemplate>
  <section [ngClass]="formLayout.cssClass">
    <form [formGroup]="form" (submit)="onSubmit($event)" class="row" *ngIf="form">
      <h2>{{formLayout.title}}</h2>
      <div [ngClass]="field.cssClass" tabindex="-1" *ngFor="let field of formLayout?.fields;">
        <div dynamicField [field]="field" (buttonClick)="buttonClick($event)" [group]="form" tabindex="-1"> </div>
      </div>
    </form>
  </section>
</ng-template>
So far we have created a basic framework to create an Angular material dynamic form. now we will design the dynamic form field from a JSON.
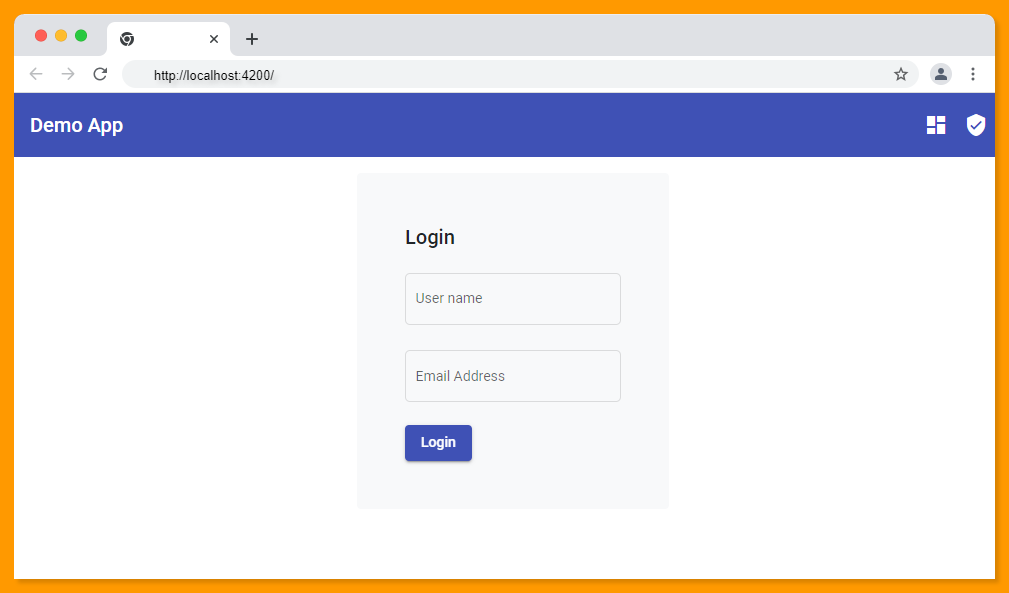
Angular Material dynamic login page with Validation Example
We have created a JSON file which we will use to create a login page and we have also added required and pattern validations in this JSON file so that we can validate the dynamically created form.
{
  "layoutType": "form",
  "postURL": "https://example.com/login",
  "title": "Login",
  "cssClass": "col-lg-4 m-auto bg-light p-5 rounded",
  "fields": [
    {
      "type": "input",
      "label": "User name",
      "inputType": "text",
      "name": "name",
      "cssClass": "col-lg-12 ",
      "validations": [
        {
          "name": "required",
          "validator": "required",
          "message": "Name Required"
        },
        {
          "name": "pattern",
          "validator": "^[a-zA-Z]+$",
          "message": "Accept only text"
        }
      ]
    },
    {
      "type": "input",
      "label": "Email Address",
      "inputType": "email",
      "name": "email",
      "cssClass": "col-lg-12 ",
      "validations": [
        {
          "name": "required",
          "validator": "required",
          "message": "Email Required"
        },
        {
          "name": "pattern",
          "validator": "^[a-z0-9._%+-]+@[a-z0-9.-]+.[a-z]{2,4}$",
          "message": "Invalid email"
        }
      ]
    },
    {
      "type": "buttonGroup",
      "cssClass": "col-lg-12 ",
      "buttons": [
        {
          "type": "submit",
          "label": "Login",
          "inputCssClass": "me-2"
        }
      ]
    }
  ]
}
Run the application the following UI will appear.
Angular Material Dynamic Dashboard Example
Next, we will design the dashboard using another JSON file which has some tiles and styles that we have defined in the JSON file.
{
  "layoutType": "field",
  "postURL": "",
  "title": "Home",
  "cssClass": "row",
  "fields": [
    {
      "type": "card",
      "label": "Employees",
      "cssClass": "col-xs-12 col-lg-3 col-sm-6  mb-2 mt-4 text-center",
      "inputCssClass": "bg-primary text-white text-center p-3",
      "icon": "addchart",
      "value": "300"
    },
    {
      "type": "card",
      "label": "Users",
      "cssClass": "col-xs-12 col-lg-3 col-sm-6  mb-2 mt-4  text-center",
      "inputCssClass": "bg-success text-white text-center p-3",
      "icon": "analytics",
      "value": "300"
    },
    {
      "type": "card",
      "label": "On Leave",
      "cssClass": "col-xs-12 col-lg-3 col-sm-6  mb-2 mt-4  text-center",
      "inputCssClass": "bg-danger text-white text-center p-3",
      "icon": "supervised_user_circle",
      "value": "300"
    },
    {
      "type": "card",
      "label": "Accounts",
      "cssClass": "col-xs-12 col-lg-3 col-sm-6  mb-2 mt-4  text-center",
      "inputCssClass": "bg-warning text-white text-center p-3",
      "icon": "queue_play_next",
      "value": "300"
    }
  ]
}
Run the application the following UI will appear.

Source code available for download
The source code is available on GitHub for the Angular material 13 image upload.
URL:https://github.com/decodedscript/angular-material-13-image-upload