This Article shows how to ASP .NET Core publish to docker container.
Microservices architecture is an approach to building applications as a suite of small services where pieces of an app work independently in its own process and improve application architecture’s scalability, too. In simple words Microservices are small applications that may be written in different programming languages and even different platforms.
As a Microservices framework, the Micro services has a big list of good features, Some of the most significant features of Microservice are: Agility, Flexible, Scaling, Easy Deployment and Reusable Code. In this article you will learn about Microservice with the help of examples.
Prerequisite
- Docker and the VS Code Docker extension must be installed
- Microsoft C# for Visual Studio Code extension.
- .NET SDK (Software Development Kit) frameworks
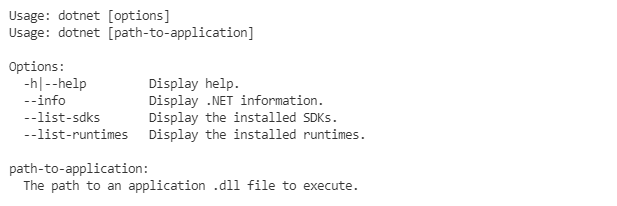
NET SDK should be installed on your machine to start building .NET apps. Once you have installed, check everything installed correctly, open new command prompt and run the following command
Dotnet If the installation succeeded, you should see an output similar to the following:

Scenario
Create a simple ASP .NET Core microservice (weather service) that returns a list of the values, then publish to docker container and run the weather service in Docker container.
Create a .NET Core Web API project
Open a terminal/command prompt and navigate to the folder in which you’d like to create the app and enter the following command.
dotnet new webapi -o WeatherMicroservice –no-https

In the above command, What do these commands mean?
- The dotnet command creates a new application of type webapi.
- The -o parameter creates a directory named MyMicroservice.
- The –no-https parameter enables to apps run without an HTTPS certificate

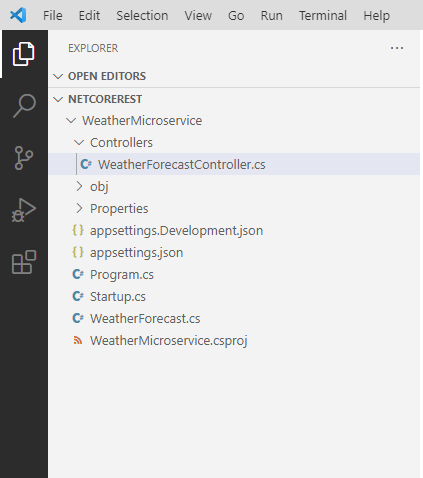
Controllers/WeatherForecastController.cs has code for a simple API that returns the weather forecast for the next five days.
namespace WeatherMicroservice.Controllers
{
    [ApiController]
    [Route("[controller]")]
    public class WeatherForecastController : ControllerBase
    {
        private static readonly string[] Summaries = new[]
        {
            "Freezing", "Bracing", "Chilly", "Cool", "Mild", "Warm", "Balmy", "Hot", "Sweltering", "Scorching"
        };

        private readonly ILogger<WeatherForecastController> _logger;

        public WeatherForecastController(ILogger<WeatherForecastController> logger)
        {
            _logger = logger;
        }

        [HttpGet]
        public IEnumerable<WeatherForecast> Get()
        {
            var rng = new Random();
            return Enumerable.Range(1, 5).Select(index => new WeatherForecast
            {
                Date = DateTime.Now.AddDays(index),
                TemperatureC = rng.Next(-20, 55),
                Summary = Summaries[rng.Next(Summaries.Length)]
            })
            .ToArray();
        }
    }
}
Run the application
In command prompt apply dotnet run command to run microservice as shown below. and wait for build to finish and then open a new browser window and navigate to http://localhost:5000/WeatherForecast
dotnet run 
Add Docker files to the project
Docker file is a text file that includes the commands and instructions that create, deploy, and run a Docker image.
let’s open Command Palette (Ctrl+Shift+P) and use Docker: Add Docker Files to Workspace.

- Choose .NET: ASP.NET Core when prompted for an application platform.
- Choose Windows when prompted to choose the operating system.
- Choose no when prompted to choose add Docker Compose files.
- Change the port for application endpoint to 5000.
- Dockerfile and .dockerignore files are added to the workspace.
Create docker image and publish to docker container
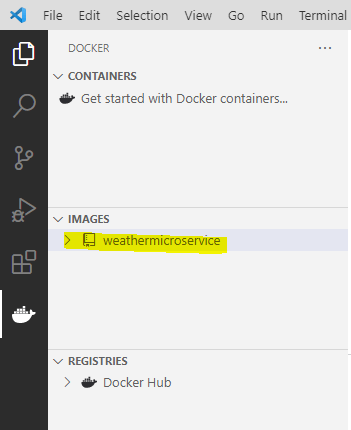
Open Command Palette (Ctrl+Shift+P) and select Docker Images: Build Image… command.


Run Docker image
You can run your app in a container using the following command :
docker run –rm -d -p 5000:5000/tcp weathermicroservice:latest
Open the web browser and navigate to http://localhost:5000/WeatherForecast. You should see weather data , similar to following:

