In this post, we will cover the fundamental understanding of what Blazor Component and finally we are going to see how to implement Blazor CRUD operations in web apps with C#.
One of the following frameworks should be installed on your machine to perform blazor crud operations.
- NET Core 3.1.7 SDK
- .NET 5.0 SDK
The latest Visual Studio 2019 version (community, professional or enterprise) with the ASP.NET and web development feature.
Get NuGet Packages
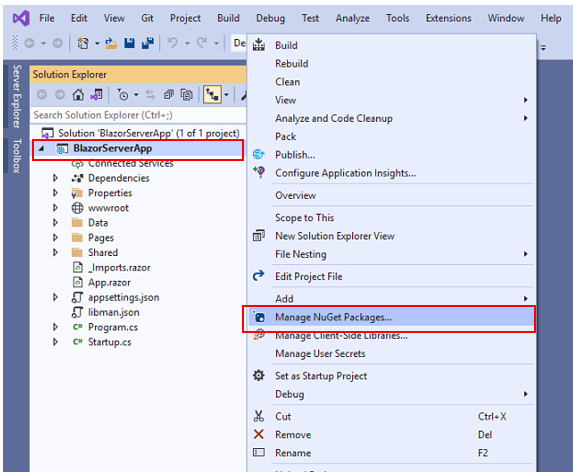
The NuGet Package Manager in Visual Studio on Windows allows you to easily install, uninstall, and update NuGet packages in solutions, To install the package, you can use either the NuGet Package Manager or the Package Manager Console.
Choose “nuget.org” as the Package source, select the Browse tab, search for Dapper, select that package in the list, and select Install:

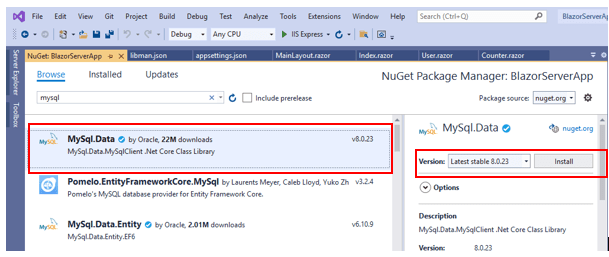
Choose “nuget.org” as the Package source, select the Browse tab, search for MySql, select that package in the list, and select Install:
Connect to a Database
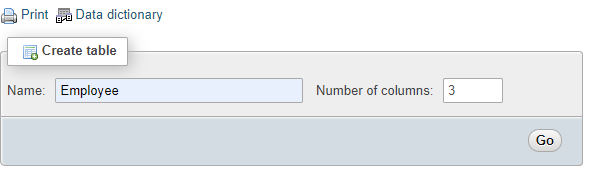
To create “Employee” table inside database, open the phpMyAdmin tool, click on the Databases tab and click on the name of the desired database.

We will see a list of all the current tables inside the database and a section named Create table. In that section, in the Name field, input the desired new name of the table and then select the number of columns that the table, click on Go to create the table.
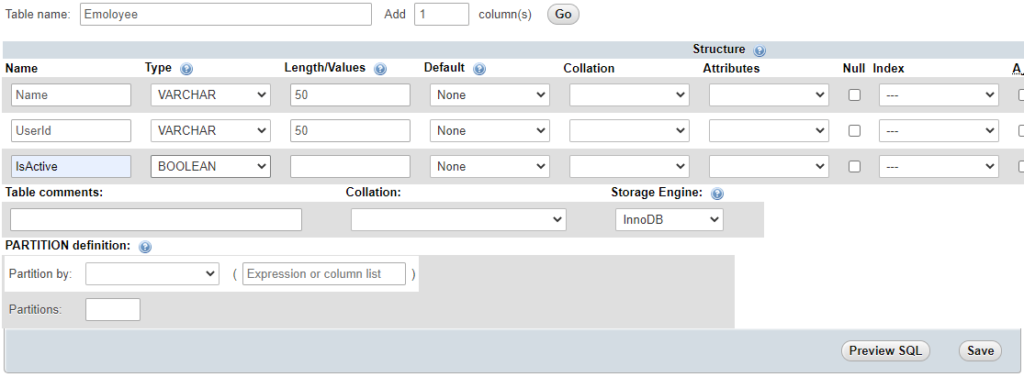
You can configure the structure of the columns in the new table
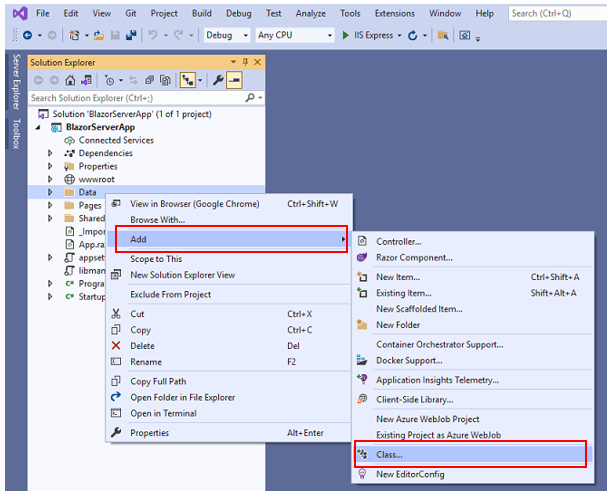
Create Class to Manage Data
We need to create a class that can create objects that represent table rows. We are going to create a class in the Data folder of our project that allow you to like insert table row, read table rows and update table rows.
Right click on project solution and choose add class option.
Create GetEmployees() method inside the Program EmployeeService.cs class to perform a simple blazor crud operations:
 public List<EmployeeModel> GetEmplyees()
        {
            List<EmployeeModel> rowAffected;
            using (IDbConnection con = new MySqlConnection(_configuration.GetConnectionString("dbConnectionString")))
            {
                if (con.State == ConnectionState.Closed)
                    con.Open();

                const string insertQuery = @"SELECT * FROM `Employee`";

                rowAffected = con.Query<EmployeeModel>(insertQuery).AsList<EmployeeModel>();
            }
            return rowAffected;
        }
Create Add Employee() method inside the Program EmployeeService.cs class:
   public int AddEmployee(EmployeeModel user)
        {
            int rowAffected = 0;
            using (IDbConnection con = new MySqlConnection(_configuration.GetConnectionString("dbConnectionString")))
            {
                if (con.State == ConnectionState.Closed)
                    con.Open();

                const string insertQuery = @"INSERT INTO `Employee`(`Name`, `UserId`, `IsActive`) VALUES (@Name,@UserId,@IsActive)";

                DynamicParameters parameters = new DynamicParameters();
                parameters.Add("@Name", user.Name);
                parameters.Add("@UserId", user.UserId);
                parameters.Add("@IsActive", user.IsActive);

                rowAffected = con.Execute(insertQuery, parameters, commandType: CommandType.Text);
            }

            return rowAffected;
        }
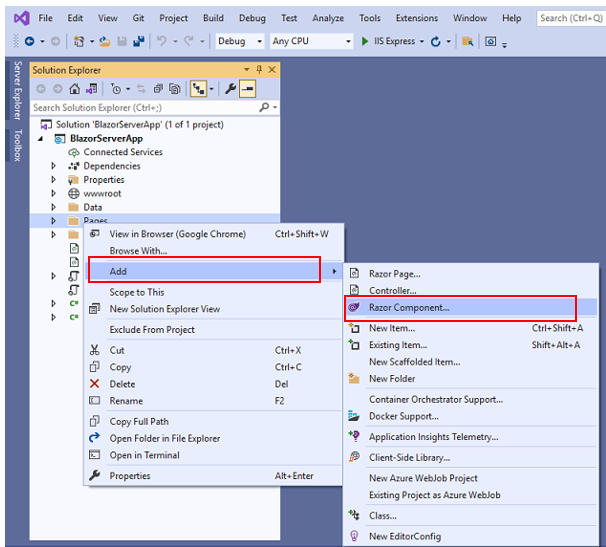
Add Blazor component for Add, Editing, Viewing and Deleting Data (Blazor CRUD operations)
To create a Blazor component, we right-click on the folder we want to create a new component for and click on the add new item menu option.
Within the Add New Item dialog, we click on Visual C# and choose Razor Component as our file template. Fill in a Component name and click on the Add button on the bottom right corner to create the file.
The structure of a Razor Component
The selected Razor component template generates a simplistic file in our Solution Explorer.
@code This directive identifies a block of C# @page directive that specifies the URL the browser must navigate to in order for it to be rendered@inject Allows components to specify dependencies they require to be injected by Blazor when it creates a new instance of the component.
Create a file within Pages Folder named AddEmployee.razor and enter the following mark-up.
<h3>Add Employee</h3>

@page "/employee"
@using BlazorServerApp.Data

@inject EmployeeService employeeService

<EditForm Model="@employeeModel" OnValidSubmit="@HandleValidSubmit" >
    <div class="col-lg-6 p-0">
        <div class="form-group">
            <label for="exampleInputEmail1">User Id</label>
            <input type="text" class="form-control" id="employeeName" placeholder="User Id" @bind="@employeeModel.UserId">
        </div>
        <div class="form-group">
            <label for="exampleInputEmail1">Employee Name</label>
            <input type="text" class="form-control" id="employeeName" placeholder="Employee Name" @bind="@employeeModel.Name">
        </div>
        <button type="submit" class="btn btn-primary">Submit</button>
    </div>
</EditForm>


@code {
    private EmployeeModel employeeModel = new EmployeeModel();

    private void HandleValidSubmit()
    {
        var result = employeeService.AddEmployee(employeeModel);
    }
}
Now run the app and we’ll see the following

Create a file within Pages Folder named Employees.razor and enter the following mark-up.
<h3>Employees</h3>

@page "/employees"
@using BlazorServerApp.Data

@inject EmployeeService employeeService

<table class="table">
    <thead class="thead-light">
        <tr>
            <th>
                Employee Name
            </th>
            <th>
                User Id
            </th>
        </tr>
    </thead>
    <tbody>
        @foreach (var employee in employees)
        {
            <tr>
                <td>
                    @employee.Name
                </td>
                <td>
                    @employee.UserId
                </td>
            </tr>
        }
    </tbody>
</table>


@code {
    private List<EmployeeModel> employees = new List<EmployeeModel>();

    private void GetEmplyees()
    {
        employees = employeeService.GetEmplyees();
    }
    protected override void OnInitialized()
    {
        GetEmplyees();
    }
}
Now run the app and we’ll see the following
