Table of Contents
Angular Material 13 Image upload with preview
Here we will discuss how easily we can implement the Angular Material 13 image upload with preview and progress bar. For image upload, we will use the Angular Material 13 component with HttpClientModule.
In addition, we will also see how we can restrict or limit the number of files to be uploaded.
let’s proceed to implement an image upload feature in an application.
We’ll implement the HTTP request in an Angular service that depends on the HttpClient to upload images. In service we have a method that accepts a file and sends it to the server:
To display upload progress and we need to pass the reportProgress and observe options in HTTP request while setting them to true and event respectively.
export class FileUploadService {
constructor(private _http: HttpClient) { }
uploadFile(files: FormData) {
return this._http.post(`${environment.API}/upload-file`, files, {
reportProgress: true,
observe: 'events'
});
}
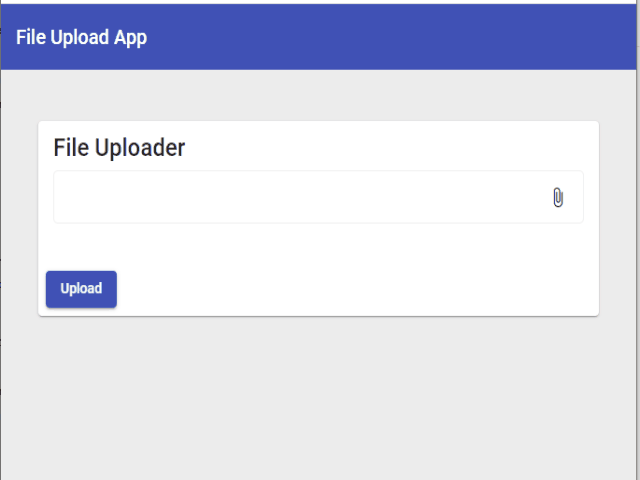
} The following HTML Template consists of an Angular Material component like input textbox with Allow Multiple property, an Angular Material Button for triggering the upload of files, and a Progress bar for displaying the progress of the files are uploaded.
   <section class="progress-bar" [hidden]="hideprogressBar">
        <mat-progress-bar color="primary" mode="determinate" [value]="percentDone">
        </mat-progress-bar>
    </section>
    <mat-card>
        <mat-card-title>File Uploader</mat-card-title>
        <mat-card-content>
            <mat-form-field class="full-width" appearance="outline">
                <mat-label>name</mat-label>
                <ng-template #newFile>
                    <mat-label>Choose file</mat-label>
                </ng-template>
                <input matInput disabled>
                <button mat-icon-button matSuffix (click)="fileInput.click()">
                    <mat-icon>attach_file</mat-icon>
                </button>
                <input hidden (change)="onSelectFile($event)" #fileInput name="uploadfile" type="file" id="file">
            </mat-form-field>
        </mat-card-content>
        <mat-card-actions>
            <button mat-raised-button color="primary" (click)="onUploadClick()">Upload</button>
        </mat-card-actions>
    </mat-card>
Is up to you how to send the file to the server, we can send image data either binary or base64 encoded the string formate.
Upload Image as a binary, on the file change event, a loop is executed over the Files property which holds the selected files, and the names of the files and files are stored in FormData.
 onSelectFile(event: any) {
    this.selectedFiles = event.target.files;
    Array.from(this.selectedFiles).forEach(file => {
      this.formData.append(file.name, file);
    })
  }
Upload Image as a base64 encoded string, Base64 encoding is the process of converting binary data into a limited character set of 64 characters but base64 encoding makes file sizes roughly 33% larger than their original binary representations.
Let’s put the program that Base64 encodes an image.
 getBase64(file: any, callBack: any) {
    var reader = new FileReader();
    reader.readAsDataURL(file);
    reader.onload = function () {
      callBack(reader.result);
    };
    reader.onerror = (error) => {
      callBack(null);
      this.snackbar.open('Error', "error", { duration: 5000 });
    };
  }
In the code above, The file variable stores our input file to be encoded. We finally get the string representation of the Base64 conversion string.
Let’s see how to get the base64 string of the image.
onSelectFile(event: any) {
    this.selectedFiles = event.target.files;
    Array.from(this.selectedFiles).forEach(file => {
      //get Base64 string
      this.getBase64(file, (res: any) => {
        this.formData.append(file.name, res);
      })
    });
  }
Next, we can add a submit button and method “onUploadClick” in our component, call the uploadFile method of the service and trigger the upload by subscribing.
onUploadClick() {
    this.fileUploadService.uploadFile(this.formData).subscribe((res: any) => {
      if (res.type === HttpEventType.Response) {
        this.snackbar.open('Upload complete', "Okay", { duration: 5000 });
      }
      if (res.type === HttpEventType.UploadProgress) {
        this.percentDone = Math.round(100 * res.loaded / res.total);
      }
    })
  }
By default, the File type input allows the users to select only a single file at a time to allow users to select Multiple files just add the “multiple” attribute in the input element.
Source code available for download
The source code is available on GitHub for the Angular material 13 image upload.
URL:https://github.com/decodedscript/angular-material-13-image-upload